Introduction to Dynamics 365 CE Custom API from a 3rd Party Tutorial
Imagine Custom APIs in Dynamics 365 CE as specialized tools for developers. These tools allow them to create custom instructions, that can be invoked to execute specific tasks within Dynamics 365.
Think of it as making your own shortcuts to carry out complex actions with a single click. Custom APIs are like these shortcuts but tailored for developers working on Dynamics 365/Dataverse. The Power-Automate connector for Dataverse also supports calling custom APIs. Leveraging Custom APIs enhances Microsoft Dynamics 365 CRM Services, enabling seamless integration and improved functionality.
Custom APIs can be seen as alternatives to custom actions. They require a plug-in developed in .NET (C#) to implement the logic executed on the server. The message creator links their plug-in type with the custom API to deliver the main operational logic. This enables seamless data exchange with external data applications. Custom APIs can also be used with webhooks to receive real-time notifications and updates from other applications.
In this tutorial blog, we will create a new Custom API in Dataverse (D365 CE) and consume it from an external application – POSTMAN.
STEPS for Dynamics 365 CE Custom API from a 3rd Party Tutorial
Step 1
We first start by writing a C# Plugin code as follows, which takes a string as an input and has a string as an output parameter.
using System;
using Microsoft.Xrm.Sdk;

namespace D365CustomActions
{
    /// <summary>
    /// This Plugin is developed by Abhishek to make a request to a D365 Custom-API
    /// </summary>
    public class NotifyPlugin : IPlugin
    {
        public void Execute(IServiceProvider serviceProvider)
        {
            IPluginExecutionContext context = (IPluginExecutionContext)serviceProvider.GetService(typeof(IPluginExecutionContext));
            IOrganizationServiceFactory serviceFactory = (IOrganizationServiceFactory)serviceProvider.GetService(typeof(IOrganizationServiceFactory));
            ITracingService tracingService = (ITracingService)serviceProvider.GetService(typeof(ITracingService));
            IOrganizationService service = serviceFactory.CreateOrganizationService(context.UserId);
            string inputString = (string)context.InputParameters["abhi_inputstring"];
            try
            {
                tracingService.Trace("Notification from the Custom-API: " + inputString);
                context.OutputParameters["abhi_outputstring"] = "Request to this Custom-API is made Successfully!";
            }
            catch (Exception ex)
            {
                throw new InvalidPluginExecutionException("Error executing the Plugin: " + ex.Message.ToString());
            }
        }
    }
}
Step 2
We then sign the assembly and register it on the Plugin Registration Tool.
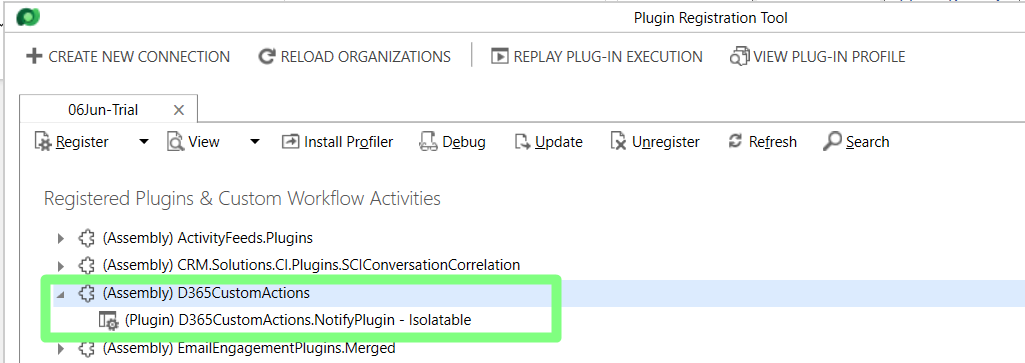
Step 3
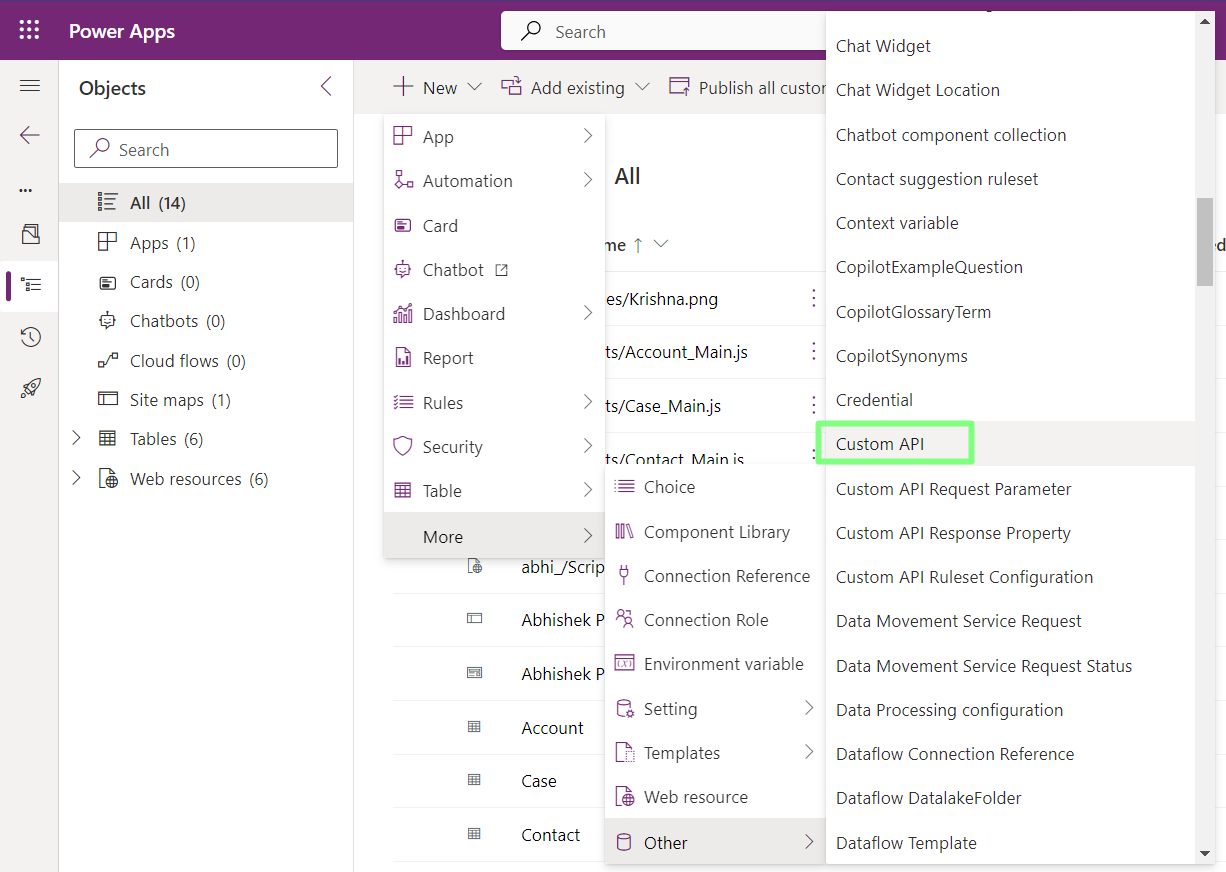
We navigate our solution on the Power-App portal, open your solution and try to create a new Custom API.
Step 4
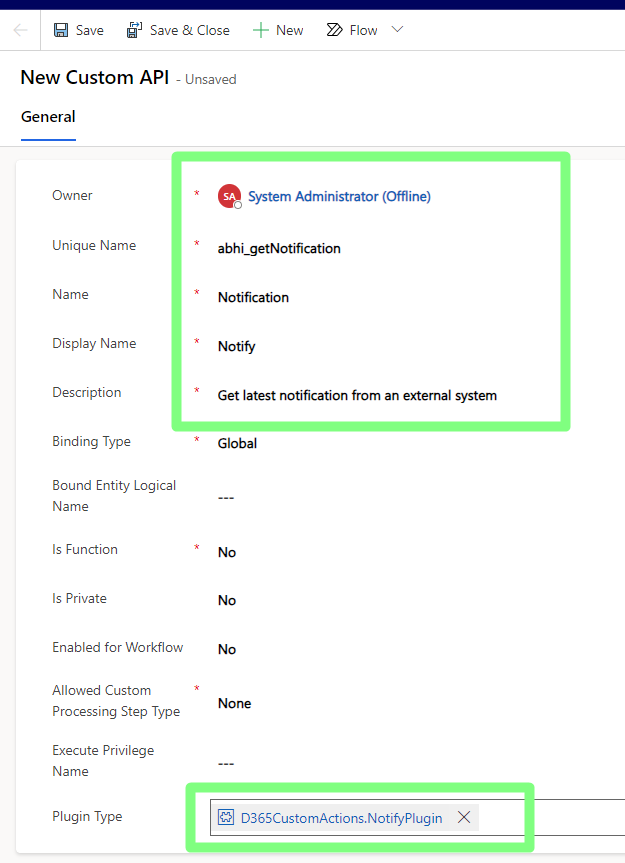
We give the Custom API a unique name and feed the necessary details as follows. We select the Plugin Type to the plugin we created and registered above.
Step 5
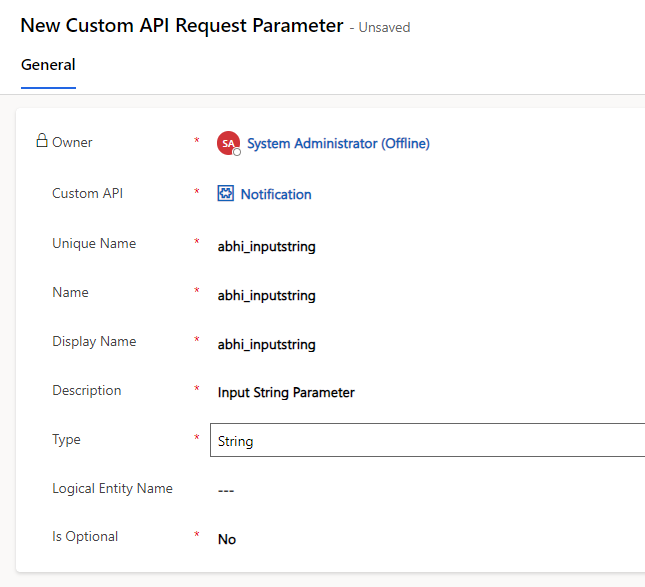
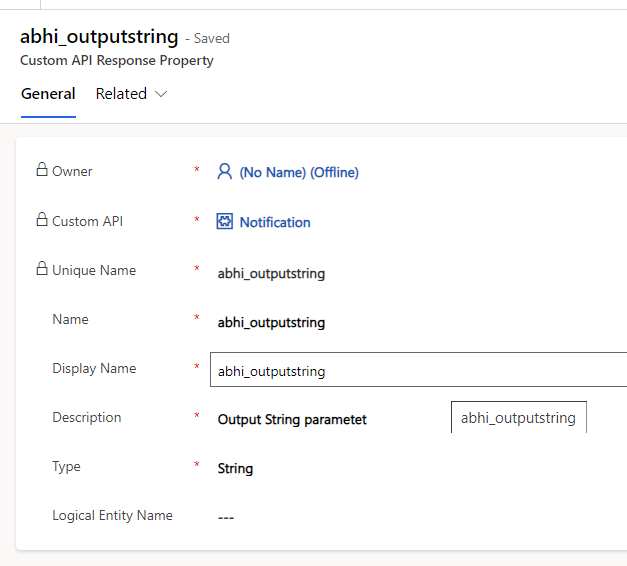
We then go ahead and create the necessary (string input and output) Custom API Request and Response Paraments as below.
Step 6
Once we save these new changes, we PUBLISH them.
UNIT TESTING
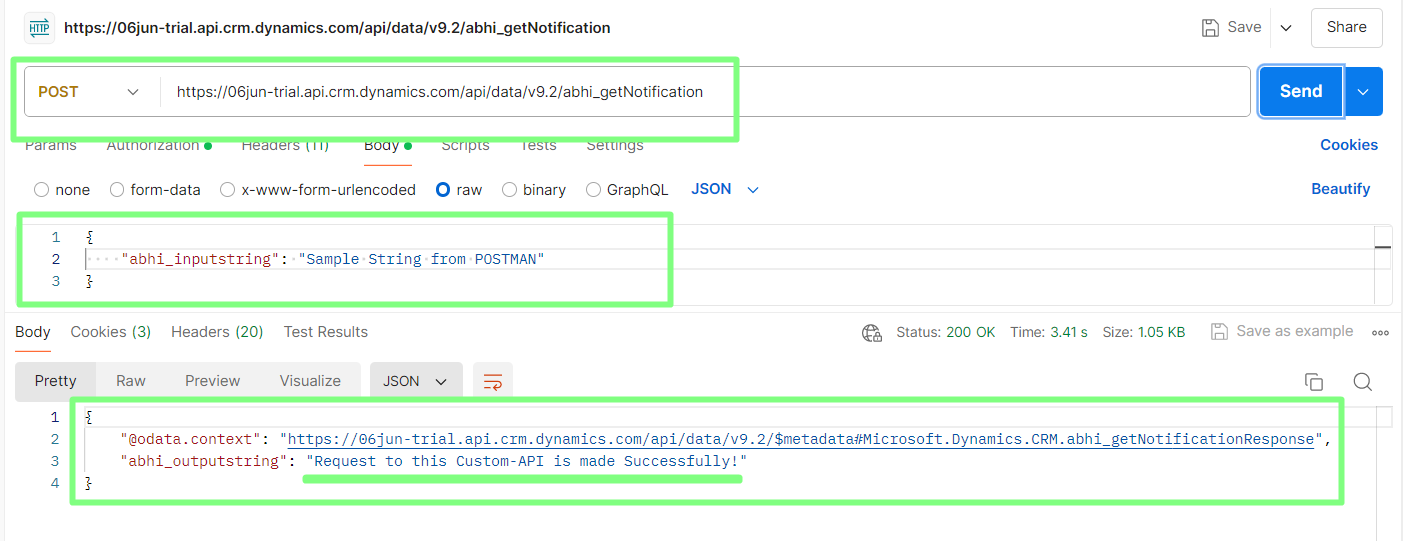
- We open POSTMAN (where our D365 CE environment is already configured) and make a POST request to our API. The Request URL for the HTTP POST Request on POSTMAN must be in the format:
<Your ORG URL>/<Unique Custom API Name>
We specify an input string (JSON format) in body as follows and receive the Status 200 in Response, along with the output parameter as we configured in our C# Plugin.
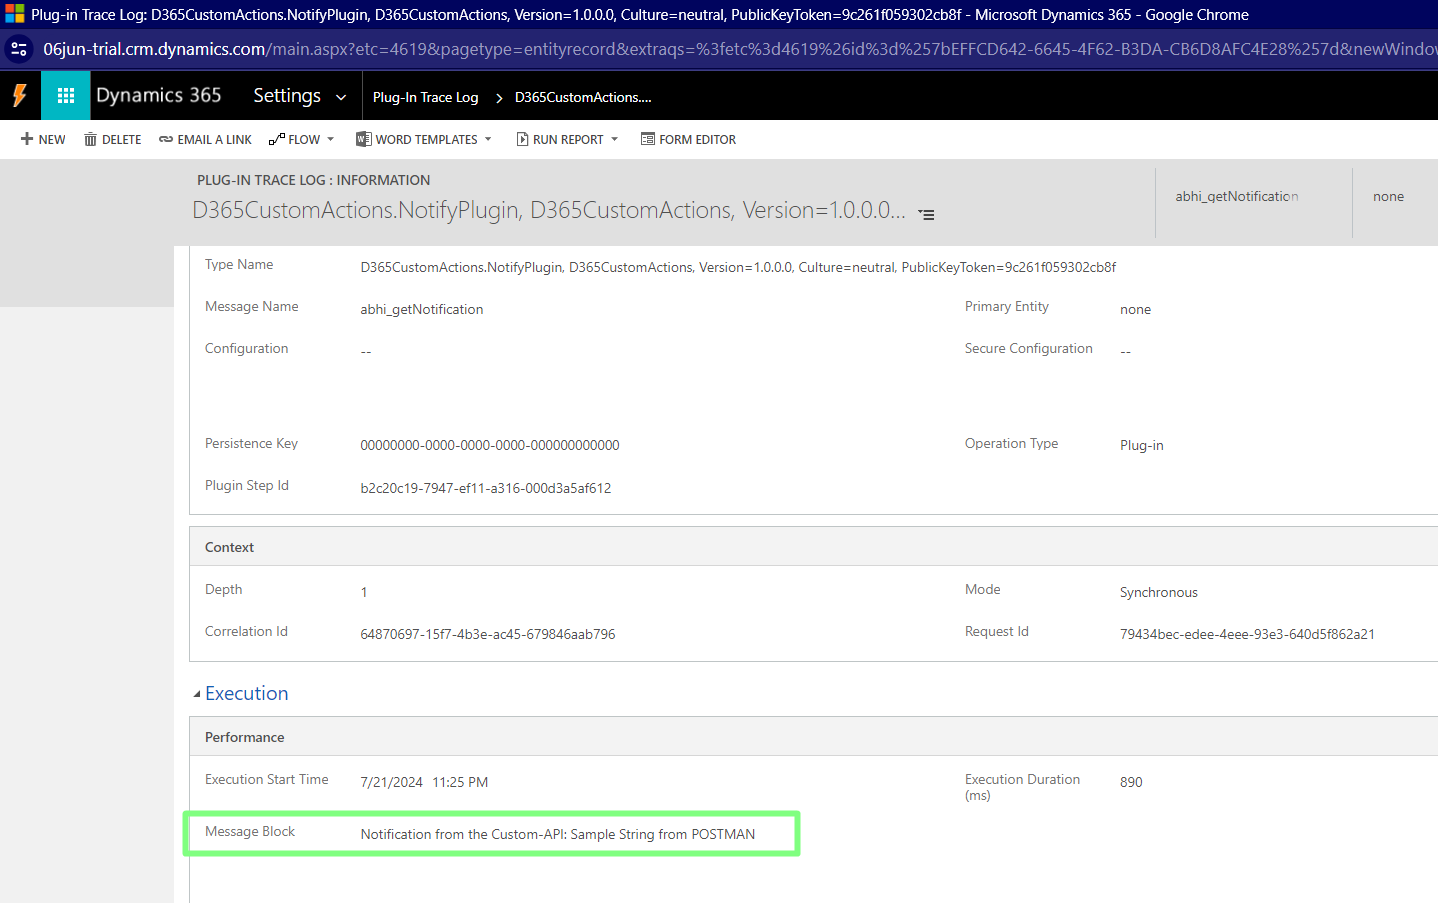
- We also verify the above in our Dynamics 365 CE – Plugin Trace Logs as follows:
CONCLUSION
Thus, developing custom APIs in Dynamics 365 enhances the platform’s functionality, facilitates integration with external applications, automates workflows, and enables real-time notifications. By following these steps to create, deploy, and test your custom APIs in D365, you can streamline and improve your business processes. Microsoft Dynamics CRM developers can leverage these custom APIs to provide tailored solution.
Read more:


