One effective way to extend CRM functionality is by integrating Power Automate with JavaScript. In this blog, we will walk through how to call a Power Automate Flow when a button is clicked within dynamics 365 CRM. This approach is useful for real-time processes like data validation, sending emails, or updating records-based specific conditions.
WHY CALL POWER AUTOMATE FROM JAVASCRIPT?
Power Automate flow allows us to build workflows that can be connect various applications and services. While Power Automate has built in triggers and actions but you may want to trigger a flow programmatically using JavaScript. This approach will offer flexibility for customizing logic, adding automation without user needing to interact with flow manually.
For example, you might want to update a record or send an email when a user clicks a button in CRM form. With JavaScript, this can be done smoothly.
PREREQUISITES
Before diving into steps, ensure you have.
- Basic understanding of Power Automate and JavaScript.
- Dynamics 365 CRM Services instance with permission to create flows and custom script.
- A power automated flow with Http Request trigger enabled.
SCENARIO:
Let us consider a scenario where, you need to send an email when a button is clicked on the Case Form. This we will achieve by using JavaScript and Power Automate Flow.
STEP 1: CREATING THE POWER AUTOMATE FLOW
First, let’s create a simple power automate flow.
- Go to https://make.powerapps.com/ and make sure you’re in appropriate environment and create a new solution.
- Inside your solution, click on New à Automation à Cloud Flow à Instant
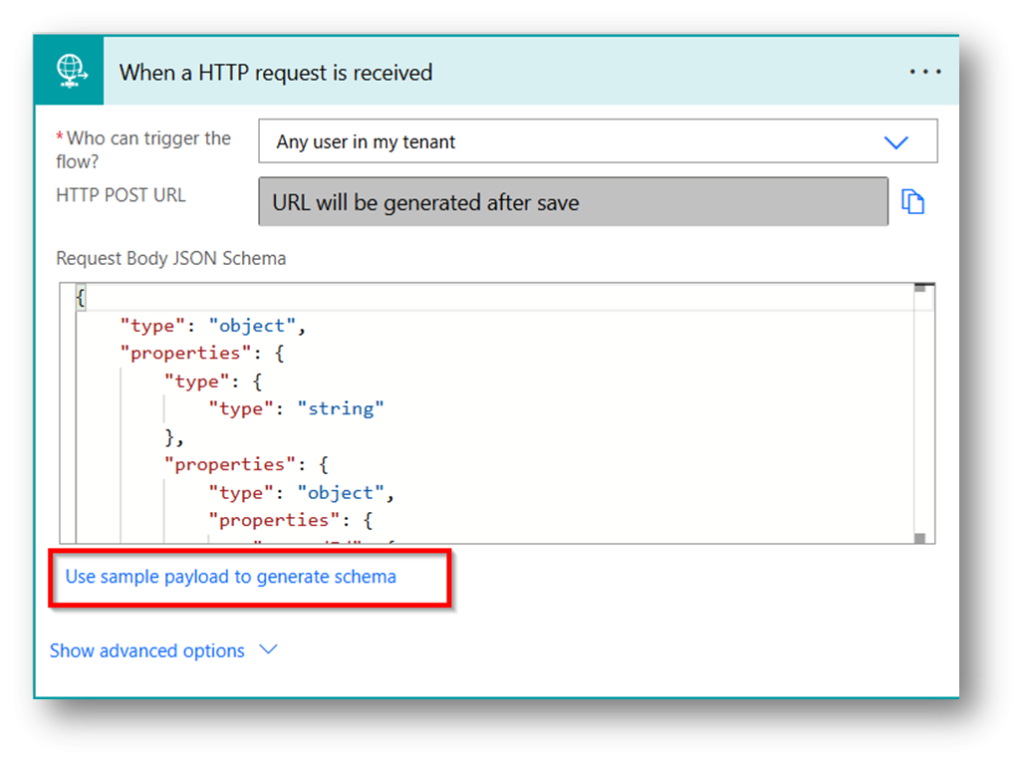
- Choose Instant Flow and select When HTTP request is received as the trigger. This allows the flow to be triggered automatically through HTTP request and click on Create.
- Define the schema for the HTTP request body that you will send from JavaScript.
- Copy below Json click on Use sample payload to generate schema and paste.
For Example,
{
  "type": "object",
  "properties": {
    "recordId": {
      "type": "string"
    },
    "entityName": {
      "type": "string"
    }
  }
}
6. Add your desired action to the flow. These actions could be anything, such as updating a record, sending email, or creating new records. For our scenario we are using sending an email.

7. After configuration the flow, save it. Copy the HTTP POST URL from the trigger as you will use this in JavaScript code.

STEP 2: WRITING JAVASCRIPT TO CALL THE POWER AUTOMATE FLOW
Well now write the JavaScript that will call the power automate flow using the http request trigger.
Here the code snippet:
function callPowerAutomateFlow(primaryControl) {
  var formContext = primaryControl;
  var recordId = formContext.data.entity.getId(); // Get the record ID
  var entityName = formContext.data.entity.getEntityName(); // Get the entity name

  // Replace with your Flow's HTTP request URL
  var flowUrl =
    "https://prod-139.westus.logic.azure.com:xx";

  var requestData = {
    recordId: recordId,
    entityName: entityName,
  };

  var req = new XMLHttpRequest();
  req.open("POST", flowUrl, true);
  req.setRequestHeader("Content-Type", "application/json");

  req.onreadystatechange = function () {
    if (req.readyState == 4 && req.status == 202) {
      Xrm.Utility.alertDialog("Flow triggered successfully."); // Success message
    } else if (req.readyState == 4) {
      Xrm.Utility.alertDialog("Error triggering the flow: " + req.statusText); // Error handling
    }
  };

  req.send(JSON.stringify(requestData)); // Send the data to the flow
}
This function does the following:
- Captures the current record GUID and entity name.
- Sends an HTTP POST request to Power Automate Flow URL, passing the record data.
- Handles success or error messages, providing user feedback.
After writing the script, upload as a JavaScript Web Resource in Dynamics 365 CRM
STEP 3: ADDING A BUTTON TO A CRM FORM
Now, let’s add a button to the Case Form that will trigger the flow when clicked.
- Navigate to your app such as Customer Service Hub.
- Click on edit and navigate to Case View and click on Edit Command Bar.
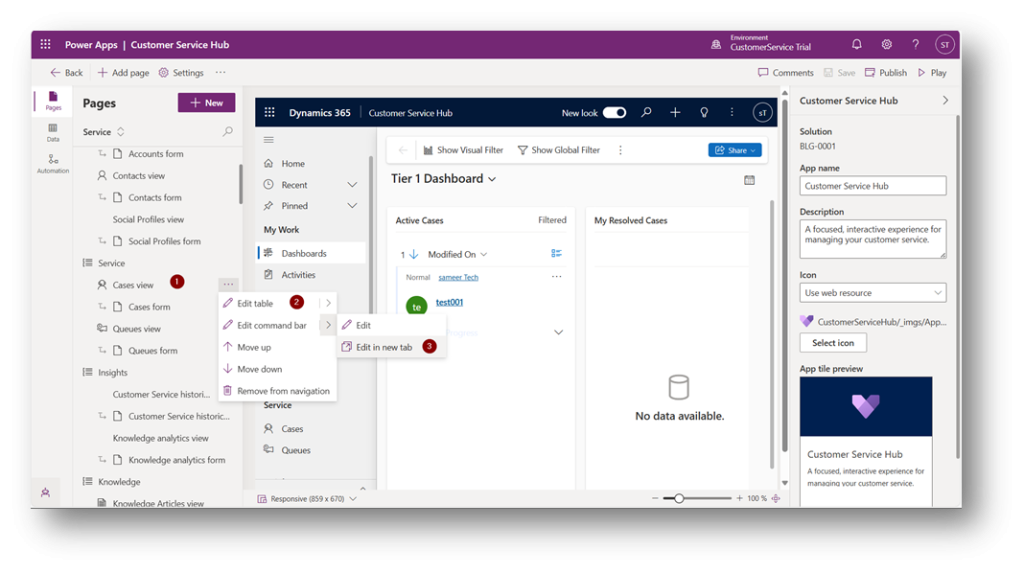
- In command editor click on New Command.
- In action select Run JavaScript.
- In Library select JavaScript which we have uploaded.
- Add parameter as Primary Control.

By Following these steps, you can trigger a Power Automate Flow from a button click in Dynamics 365 CRM using JavaScript.
STEP 4: TESTING THE FLOW
After setting everything up, it is essential to test whether it is working as expected.
- Navigate to the Customer Service Hub and open any Case record.
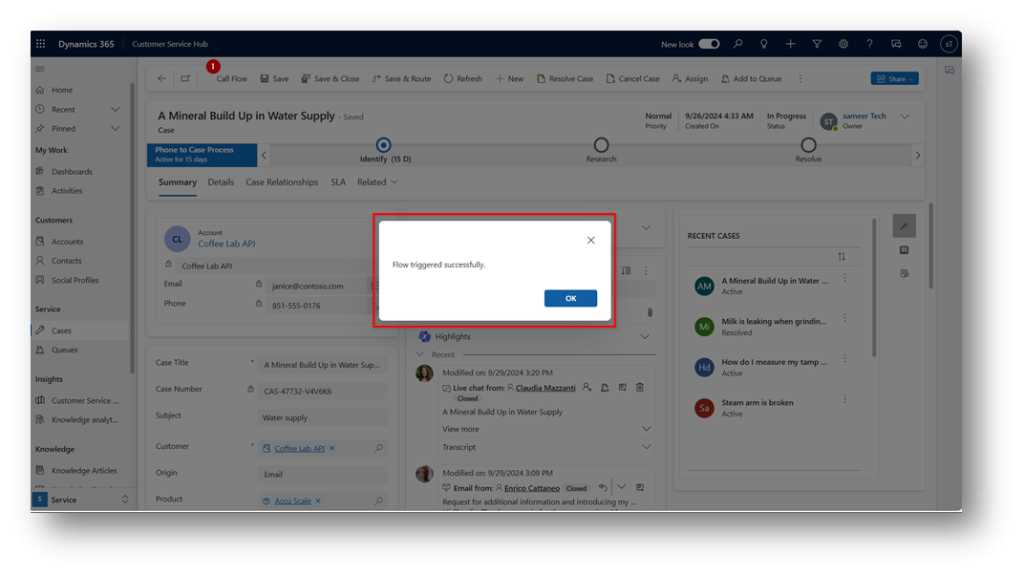
- Locate the Call Flow button you added to your form and click it.
- You should see an alert confirming whether the flow was triggered successfully or an error message if something went wrong.
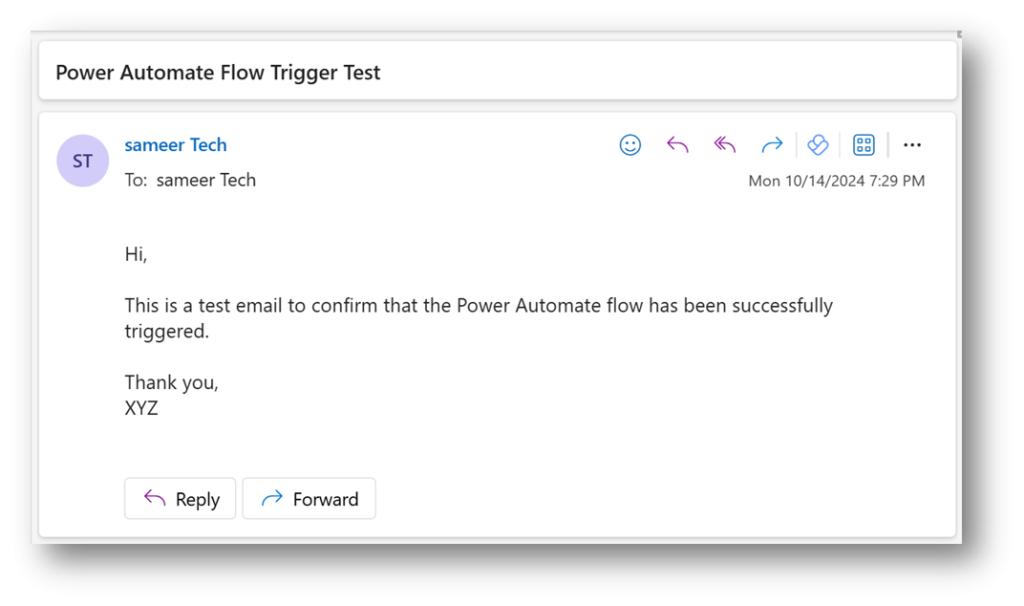
- Check your Power Automate Flow’s run history to ensure the flow was executed, and confirm that the email was sent as expected.
Email sent:
By integrating Power Automate Flow with JavaScript in dynamics 365 CRM, you can streamline process, automate task, and reduce manual efforts, all triggered with a simple button click. This approach enhances the user experience and offers greater flexibility for building custom workflows in your CRM environment.
Try this out and see how it can improve your workflows!


